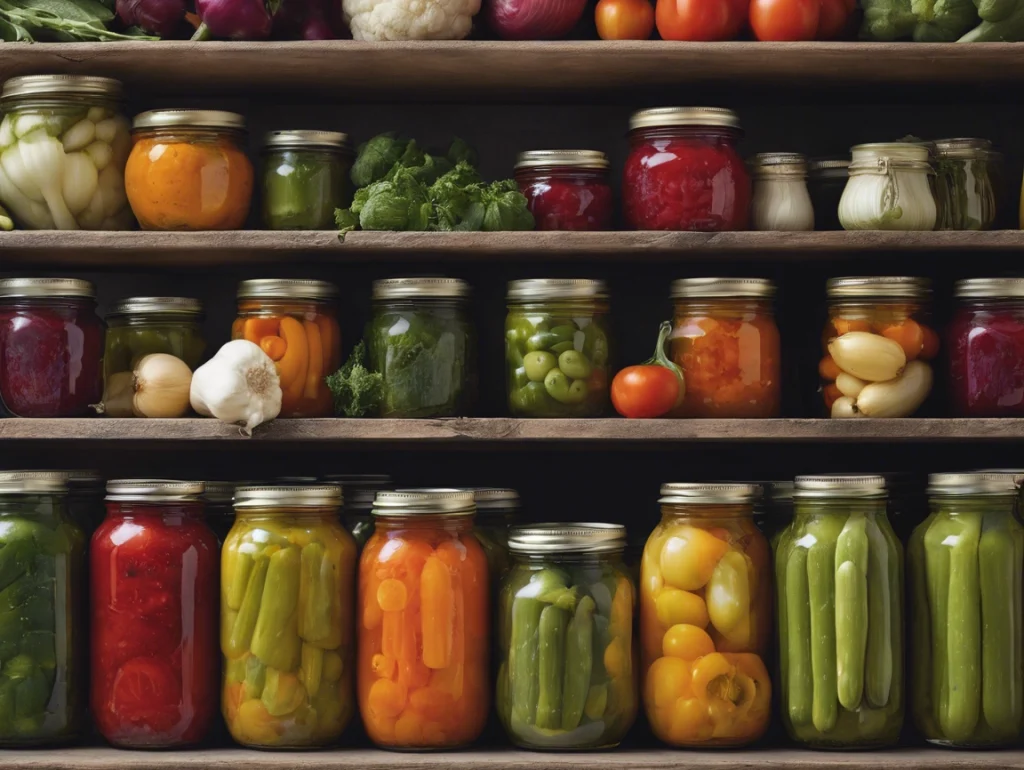
Living off the grid is a lifestyle choice that’s gaining popularity, and canning vegetables is a cornerstone of this sustainable way of life. Whether you’re nestled in a remote cabin or simply seeking to reduce your carbon footprint, canning offers a way to preserve the bounty of your garden or local market for year-round enjoyment. Let’s delve into the art of canning vegetables and how it supports living off the grid.
The Basics of Canning Vegetables
Canning is an age-old method that involves placing vegetables in jars and heating them to a temperature that destroys microorganisms and inactivates enzymes that could cause spoilage. This process also removes air from the jars, creating a vacuum seal that keeps the contents safe for consumption over an extended period.
Understanding the Science of Canning
At its core, canning is a scientific process that halts the natural spoilage of food. This is achieved through:
- Heat Treatment: Vegetables are heated to a temperature that destroys potentially harmful microorganisms.
- Vacuum Sealing: The heating process expels air from the jars, creating a vacuum seal as they cool, preventing the growth of bacteria, yeasts, and molds.
Preparing for Canning
Before you begin canning, it’s essential to have a clean and organized workspace. Gather all necessary equipment and ingredients:
- Canning Jars: Use jars specifically designed for canning, ensuring they are free of cracks and chips.
- Lids and Bands: Always use new lids to ensure a proper seal. Bands can be reused if they are not warped or rusted.
- Canning Tools: A jar lifter, canning funnel, and bubble remover are invaluable tools for safe and efficient canning.
Step-by-Step Canning Guide
- Sterilization: Start by sterilizing your jars and lids. This can be done by boiling them in water or using a dishwasher with a sterilize setting.
- Preparation of Vegetables: Clean your vegetables thoroughly. Peel, chop, or slice them according to your recipe or preference.
- Blanching: Some vegetables may require blanching—a quick boil followed by an ice bath—to preserve color and texture.
- Packing the Jars: Fill the sterilized jars with your prepared vegetables, leaving the recommended headspace.
- Adding Liquid: Pour boiling water or a pickling solution over the vegetables, maintaining the necessary headspace.
- Removing Air Bubbles: Slide a non-metallic spatula around the inside edge of the jar to release trapped air bubbles.
- Sealing the Jars: Wipe the rims clean, place the lids on the jars, and screw on the bands until fingertip tight.
- Processing: Place the jars in the canner—either a water bath canner for high-acid foods or a pressure canner for low-acid foods—and process for the time specified in your recipe.
- Cooling: Once processed, remove the jars from the canner and let them cool undisturbed for 12-24 hours.
- Testing Seals: Check that the lids have sealed by pressing the center of each lid. If the lid does not pop up and down, it is sealed properly.
Safety Considerations
- Acidity Levels: Understand the acidity level of the vegetables you’re canning. Low-acid foods must be processed in a pressure canner to prevent the risk of botulism.
- Recipe Accuracy: Use only tested recipes from reliable sources to ensure safety and quality.
- Inspection: Before consuming, inspect your canned goods for any signs of spoilage, such as off-odors, mold, or bulging lids.
Canning vegetables is a blend of art and science, requiring attention to detail and adherence to safety guidelines. By following these steps, you can ensure a successful canning season and enjoy the fruits of your labor all year round.
Selecting the Right Vegetables
When it comes to canning, not all vegetables are created equal. The process of canning involves high heat and pressure, which can affect the texture, flavor, and nutritional value of the produce. Therefore, it’s important to select vegetables that are well-suited to withstand this process and still come out delicious.
Ideal Vegetables for Canning
- Tomatoes: A canning favorite, tomatoes can be canned as sauces, juices, or whole. They have a natural acidity that is conducive to canning, although some modern varieties may require added acid for safe preservation.
- Green Beans: Known for their ability to retain texture and flavor, green beans are a popular choice for home canning.
- Carrots: Their firm texture makes carrots ideal for canning; they can be diced, sliced, or canned whole.
- Peas: Sweet and tender, peas can be canned on their own or as part of a mixed vegetable medley.
- Corn: Canning preserves the sweetness of corn, making it a tasty addition to your pantry.
- Beets: Their robust nature makes beets a great candidate for canning, perfect for salads or sides.
- Cucumbers: While not typically canned on their own due to high water content, cucumbers are excellent for pickling.
Vegetables to Approach with Caution
- Leafy Greens: Generally not recommended for canning due to texture changes and potential safety concerns.
- High-Water Content Vegetables: Such as celery or zucchini, which can become mushy when canned.
Preparing Vegetables for Canning
Once you’ve selected your vegetables, proper preparation is key:
- Wash Thoroughly: Ensure all dirt and debris are removed.
- Peel and Trim: Remove skins and ends as needed.
- Cut Uniformly: Consistent sizes help ensure even cooking and canning.
- Blanch if Necessary: Some vegetables, like peas and carrots, benefit from blanching before canning to preserve color and texture.
Considerations for Safety and Quality
- Acidity: Low-acid vegetables require pressure canning to prevent the risk of botulism.
- Freshness: Use vegetables at their peak of freshness for the best flavor and nutritional content.
- Packing Method: Decide between raw pack or hot pack methods, depending on the vegetable and your preference.
By carefully selecting and preparing the right vegetables, you can ensure a successful canning experience that yields delicious, safe, and nutritious results to enjoy throughout the year.
The Canning Process
Canning vegetables is a rewarding way to preserve your garden’s harvest or take advantage of seasonal produce. Here’s a detailed, step-by-step guide to help you through the canning process:
Step-by-Step Guide to Canning Vegetables
Step 1: Gather Your Equipment
Before you start, make sure you have all the necessary equipment:
- Pressure canner
- Canning jars, lids, and bands
- Jar lifter, canning funnel, and bubble remover
- Large pot for blanching vegetables
- Clean cloths and towels
- Cutting board and knife
- Ladle and non-metallic spatula
Step 2: Prepare Your Vegetables
Select fresh, ripe, and unblemished vegetables. Wash them thoroughly under running water. Depending on the vegetable, you may need to peel, chop, slice, or blanch them before canning.
Step 3: Sterilize Your Jars and Lids
Sterilize your canning jars by boiling them in water for 10 minutes or using the sterilize cycle on your dishwasher. Keep the jars hot until they are ready to be filled.
Step 4: Fill the Jars
Using a canning funnel, pack your prepared vegetables into the jars, leaving the recommended headspace (usually 1 inch). Add boiling water or a pickling solution, maintaining the headspace.
Step 5: Remove Air Bubbles
Slide a non-metallic spatula around the inside edge of the jar to release any trapped air bubbles. Adjust the headspace if necessary by adding more boiling water or solution.
Step 6: Wipe the Rims and Seal the Jars
With a clean cloth, wipe the rims of the jars to ensure a good seal. Place the sterilized lids on the jars and screw on the bands until they are fingertip tight.
Step 7: Process the Jars
Place the jars in the pressure canner, following the manufacturer’s instructions for your specific model. Process the jars at the pressure and time recommended for the type of vegetable you are canning.
Step 8: Cool Down
Once the processing time is complete, turn off the heat and let the canner cool down naturally. Do not attempt to open the canner while it is still pressurized.
Step 9: Remove the Jars
Using a jar lifter, carefully remove the jars from the canner and place them on a towel or cooling rack. Leave them undisturbed for 12-24 hours.
Step 10: Check the Seals
After the jars have cooled, check the seals by pressing the center of each lid. If the lid does not move up and down, it is sealed properly. Label your jars with the contents and the date of canning.
Step 11: Store Your Canned Vegetables
Store your sealed jars in a cool, dark place. Unsealed jars should be refrigerated and used within a few days.
Remember, safety is paramount when canning. Always use a pressure canner for low-acid vegetables to prevent the risk of botulism, and follow trusted recipes and guidelines. With these steps, you’ll be well on your way to enjoying your home-canned vegetables all year long.
Living Off the Grid with Canned Vegetables
Preserving the Harvest
Canning your own vegetables is a practical way to preserve your garden’s bounty. It allows you to capture the peak freshness and nutritional value of your produce, ensuring that you have access to healthy food even during the off-season. This method of preservation is particularly valuable for off-grid living, where access to fresh produce can be limited by location and seasonality.
Reducing Dependency
One of the core principles of off-grid living is reducing dependency on external systems. Canning vegetables means you’re less reliant on grocery stores and the commercial food supply chain. This independence is not only empowering but also provides a sense of security in knowing you have a stockpile of food that can sustain you and your family.
Energy Efficiency
Canned vegetables don’t require refrigeration, which aligns perfectly with the energy-conscious approach of off-grid living. By preserving your food through canning, you save on the energy that would otherwise be needed to power refrigerators or freezers. This is particularly beneficial for those who rely on alternative energy sources, such as solar or wind power, which may not always provide consistent energy output.
Eco-Friendly and Cost-Effective
Canning your own vegetables is both eco-friendly and cost-effective. It reduces the carbon footprint associated with transporting food and minimizes food waste by allowing you to store surplus produce. Additionally, canning at home can be more economical in the long run compared to purchasing canned goods from the store.
Variety and Creativity in Meals
Canned vegetables offer variety in your diet, allowing you to enjoy different flavors and nutrients throughout the year. They can be used in a wide range of recipes, from soups and stews to casseroles and side dishes. Canning also provides an opportunity to get creative with your food, as you can experiment with different herbs and spices to enhance the taste of your preserved vegetables.
Preparedness and Peace of Mind
For those living off the grid, being prepared for any situation is crucial. Canned vegetables are an essential component of any emergency food supply, providing peace of mind that you have a stable food source in case of unexpected events or natural disasters.
Community and Sharing
Canning is not just about preserving food; it’s also about preserving a way of life. It fosters a sense of community as you can share your canned goods with neighbors or trade with others for items you may not have. This exchange strengthens community bonds and supports a collaborative approach to off-grid living.
In conclusion, incorporating canned vegetables into your off-grid lifestyle is a smart and sustainable choice that offers numerous benefits. It’s a tradition that has stood the test of time and continues to be an integral part of living in harmony with the land and the seasons
Conclusion
In the journey towards a self-sustaining lifestyle, canning vegetables is more than just a method of food preservation; it’s a declaration of independence and a commitment to a healthier, more resilient way of life. By mastering the art of canning, you embrace the rhythms of nature, celebrate the seasons, and ensure that the hard work put into your garden provides nourishment all year round. It’s a practice that connects us to our ancestors and continues to be relevant in our modern world, especially for those who choose to live off the grid.
As we conclude, it’s important to recognize that canning is not just about stocking up; it’s about creating a legacy of sustainability for future generations. It teaches us patience, resourcefulness, and the value of preparation. Whether you’re a seasoned canner or new to the process, each jar sealed is a testament to the abundance of nature and our ability to harness it. So, as you savor the flavors of your home-canned vegetables, take pride in knowing that you’re part of a community that values self-reliance, cherishes the environment, and looks forward to a future where every season’s harvest brings joy and security.